Tuesday, November 29, 2016

The Title is Story

Blue Fern Studios

I am in love with Blue Fern Studios - Courtship Lane paper collection! Here is the cover of a recently completed project. The short chipboard title 'Story' is from Blue Fern Studios; it has been heat embossed and then glittered.
The frame is a glittered diecut, and the street lamp has been fussy cut.
Our November Challenge

Announcement: I will be conducting a workshop, in Jan and Feb inshallah, on how to make this complete album / scrapbook / memory book -- The registration link will be posted in a couple of weeks, so stay tuned.

Happy Crafting!

Tuesday, October 25, 2016

Paris Themed Scrapbook

Blue Fern, Dusty Attic, Dove Craft
If you have been following me on 
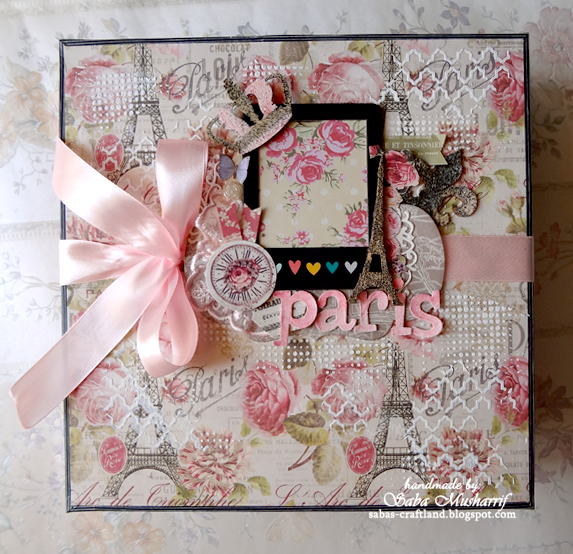
Instagram, you must have seen a preview of the Paris themed scrapbook that I completed, not so long ago. Well, I have finally managed to take out time to share the details with you, hope you enjoy reading about it just as much as I enjoyed making it. This scrapbook was made for a lady, to document her first ever trip to her most favorite place in the whole wide world; Paris. This was going to be a very special trip, and so I wanted to make this scrapbook very special too.
Blue Fern Embossing Powder
 I heat embossed the chipboard elements using the absolutely gorgeous embossing powders by Blue Fern Studios. These embossing powders have a beautiful glittery finish, which adds a whole new dimension to the project.

I added some charms to the binding ring, along with organza and satin ribbons.
The pages weren't the regular ones, but with flip pockets. Below is a picture of the first page.
You can see that it opens to a regular page, but when you flip over the Eiffel tower, there is a pocket and a tag, and when you flip that again, there are two more pockets with removable mats. So most of the pages flip open to reveal more photomats / journalling space or pockets.
Blue Fern Studios, Dove Craft Sweet Paris

The crown is chipboard, embossed and decorated with tiny beads. 

This trellis style pocket is my favorite <3

 Photomats with journalling space in the back.


wycinanka chipboard, Prima flowers, Ranger Micro beads
I love these chipboard frames by Wycinanka; the bows on it are so cute. I simply colored the bows, outlined the frames, and then heat embossed them to seal the color. There is an opening on top of each frame which lets you slip the pictures in.

Added a lace dress with ribbon and a rose, to the diecut dress form.

Used chipboard vines, along with paper and ribbon flowers for this pocket. Love how bright and colorful it turned out.


 This is another flip over page. Created a pocket for the small tag by cutting out the roses from the pattern paper.
Prima Marketing Inc
 I also fussy cut the vines in the above pocket; to add interest and detail.
Dove Crafts, Prima Marketing Inc
 
Prima Marketing Inc Tales of You and Me 
I had so much fun making this one; I drew out a deep oval, and then cut it out leaving the roses and leaves in place. Added die cut lace to make it look super delicate.
 
 This is a removable frame; this too was fussy cut, and layered so that its sturdy.


On the last page I added lots of elements, which I fussy cut from the patterned paper.
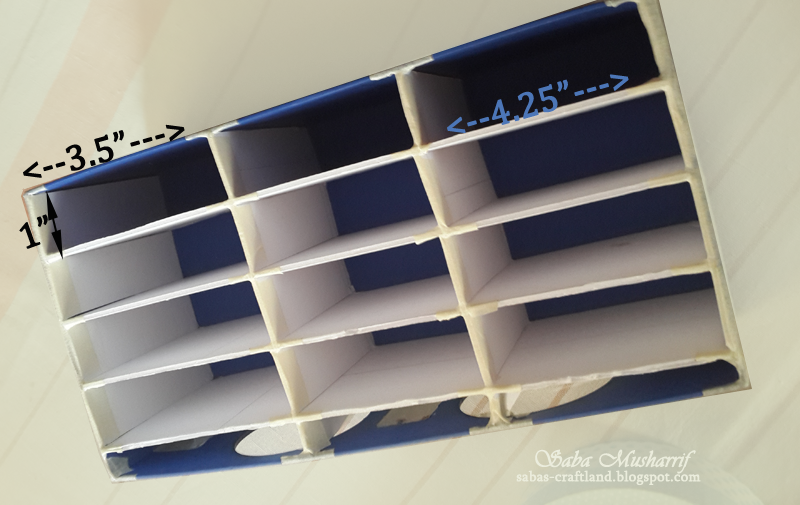
For the box (rigid heavy board box), I used the same patterned paper as the cover, and added some texture to it.

 Added lots of embossed elements here, along with lace, ribbon, and diecuts.
Prima Marketing Inc, Blue Fern Studios, Dove Craft
The chipboard frame has an opening on the top, so you can add a picture to it.
And that's about it...
Thanks for stopping by,
Happy Crafting,


Tuesday, October 18, 2016

A Shelf for the Ink Pads - DIY


If you have been paper crafting for sometime now, I am sure you have a sizable collection of inks, half of which you've forgotten about, because they aren't 'visible' all the time. Due to limited space, and sheer lack of organization, I had similar issues and so, I decided to make a shelf for these colorful little things.

I started off with this very sturdy gift box, which I had received from Pepsi as part of their Lighting Up Lives Campaign (its a great campaign). I choose to work with this one because the lid and the base have the same depth, making it easier to stack them on their sides. 

So step one was to basically remove the lid from the base, and add horizontal layers to form the shelves. For the layers I've used light board (left over from a previous project,) which has a thickness of 1/8". Since the Inks pads are not heavy, this board served the purpose well.
Incase you are wondering about the measurements, at this stage, I simply placed the box over the board and traced out the required size. The spacing between each shelf, however was approximately 1".

Step two was securing the shelves, in place and adding vertical dividers. I cut out comb style dividers, as I felt they would not only be very sturdy but also super easy to adhere. (You will need to add 0.5 inches slits in the shelves too, this will allow the divider and shelf to lock together)
Once cut, I simply pushed these into the existing layers and secured it all together, keeping a distance of 3.5" and 4.25" as shown below. 3.5" is good for distress ink pads, 4.25" works for staz on, archival etc.

I repeated the same steps for the lid, and then secured it on top of the base. This gave me shelving space to 24 ink pads <3.


Next I simply painted the base, stamped over it, and added chipboard Alphas. Once dry, it was home to some of the ink pads and their accessories!

I am, alhumdolillah, so happy with this. It has made life so much easier. It took me around 5 hours to make it, super easy and so useful. If you don't want to buy one, then try making one for yourself too.
Take care, and happy crafting


Monday, September 12, 2016

Eid Mubarak!

Altenew Eid Greetings

Wishing all of you a blessed and happy Eid!
~Taqabballahu minna wa minkum~
~May Allah accept it from you and us~

This Eid, I had the pleasure of making Eid cards in the colors of the MSA logo; navy blue and white. For the center focus I used the Altenew Eid Greetings stamp set, and water colored the image.


The sentiment was heat embossed in Silver, and my little nephew Zubayr dry embossed the white base, and layered it onto textured blue card.


Oh we had lots of cards to make, and I would not have been able to complete these in time, without the super awesome Zubayr <3. By the way, the video above... that too was recorded by my little angel. =D
 
Altenew Eid Greetings, Spellbinders Medallion embossing folder
And this is what the finished cards looked like.

Sending lots of love and prayers your way, this Eid.
Happy Crafting!


Thursday, July 28, 2016

Gray and Blue

blue gray, Scrapiniec, handmade flower card

Blogging after a fairly long time! Today I wanted to share this card, the color theme for which is inspired by the work of the very talented Erum Tasneem.
It is a blessing to be surrounded by creative and inspiring artists.

The background is heat embossed, the frame is Scrapiniec chipboard 
blue gray, Scrapiniec, handmade flower card

and the flowers are handmade.

Happy Crafting!

Saturday, June 25, 2016

Eidi Pockets

Hello Lovelies!
Since Eid is round the corner, I posted a tutorial on these Eidi Pockets so all of you can make some of your won. Hop over to Artful Craftings blog to view the details.
Used the Altenew Ramadan Greetings and Eid Greetings Stamp for these.


Wednesday, June 22, 2016

Roses and Lace

Here is a 6"x6" card, made with the "Coffee In The Arbour" collection, by Maja Design. I am totally in love with their June mood board, and am delighted that I could get the project ready in time for submission.
http://majadesign.nu/mood-board-june/
The lace has been hand cut from Vintage Summer Basics:1899-bs, using Tim Holtz: Lace stencil, (if you are following me on instagram, you must have seen the progress posted :P) It wasn't an easy task, but the results were amazing. I added some details to the hand cut lace, just to make it look a little more delicate.


For the gathers, I've used Grandma's Old Porcelain. The gathers are held up with roses, strung together with a chain. The Eiffel Tower charm, added as a symbol of love.


Added some texture to the top using the same lace stencil, and embellished it with butterflies and pearls. The butterflies were hand cut from Butterflies are Free.

For the base visible through the lace, I've used Surfs Up, which I toned down with Picket Fence paint. An inked up piece of 1899 was added to the bottom corner, with "Congratulations" heat embossed in white.


And that's about it! All the card stock used in this card was received from Artful Crafting as part as my June Kit. All items have been linked, and you can shop them from the webstore, if you please.

Link to the Maja Design Challenge: Mood Board June

Happy Crafting!

Related Posts Plugin for WordPress, Blogger...