Showing posts with label tutorial. Show all posts

Tuesday, January 1, 2019

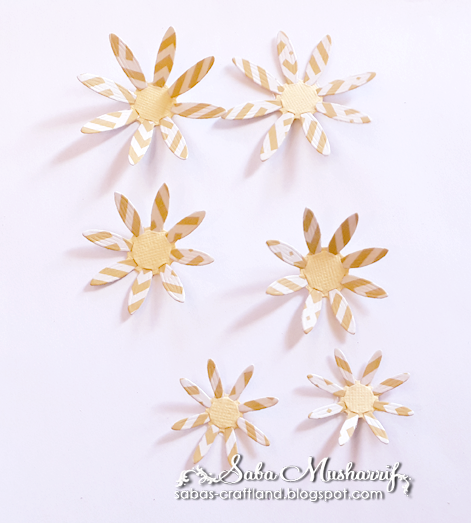
Tutorial: No Stamp Floral Embellishment


My first post for 2019, is about making a gorgeous yet super simple layered flower. I strongly believe in using the tools that we already have, and here is one example of how you can use your floral dies to create a unique floral embellishment.

You can view the full tutorial on my youtube channel .


Happy Crafting!

Tuesday, August 21, 2018

Hajj 2018 Mubarak!


Sharing a card made using the gorgeous lace card die, by Elizabeth craft designs. This Hajj Mubarak card is a little bigger than the normal cards, it is about 5.5" x 6 1/8" in size.

You can view the tutorial here:


Sharing a close up below:

Happy Crafting!


Tuesday, June 12, 2018

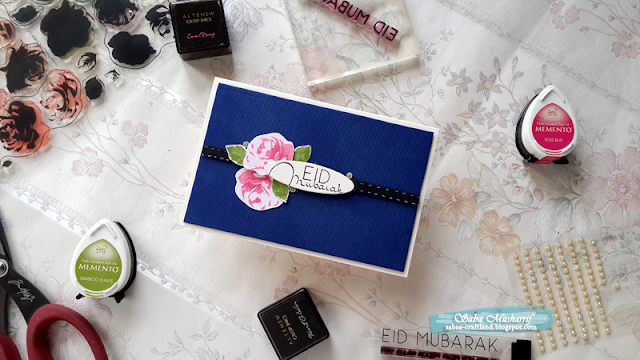
Eid 2018: Card Tutorial


With Eid preparations in full swing, I finally managed to upload this Eid Mubarak card tutorial.


It is a simple card, made with warm colors and the gorgeous Vintage Roses layering stampset from Altenew.

Hope you enjoy this tutorial and make lots of beautiful cards this Eid!


Monday, April 23, 2018

Ramadan 2018: Card Tutorial


With Ramadan only 23/24 days, I decided to make some fun vibrant, Ramadan Kareem cards for loved ones. I captured the entire process on video, to share with everyone, so that you too feel inspired to make some of your own.


In this video tutorial I have used stamps from Altenew, Kaisercraft and Prima Marketing Inc. Instead of using distress inks, I opted to use pigment inks, by Color Box, and black Archival Ink.


Have a wonderful day!


Sunday, March 18, 2018

Altered Alphabets: Kids room decoration


Today I am blogging about the wooden alphabets that I recently altered, for my little nephew. I have captured the process on video, and you can watch it below.


Here is a close up of the glittery stars,


List of items used :
- Delta Ceramcoat Acrylic Paint:
Caribbean Blue
Blue Bayou 

- Stencils:
Tim Holtz - Dot Fade
Stars

- Distress Ink:
Pumice Stone

- Texture Paste

- Glitter Glue

- Paint Brush

- Sponge

Happy Crafting!!

Tuesday, April 11, 2017

The Butterfly Card

Here I am today, sharing another one of my projects. It is a simple card, which I have embossed using my scoreboard, and then inked, to create the gorgeous background.
I am so in love with the colors. The butterfly is die cut from one of my Gelli prints.

I did capture the entire process (except the Gelli Printing bit) on camera.
Youtube link below.


 Linking my card to:
My Time To Craft!: Challenge 343
Crafty Cardmakers: Challenge 186

Happy Crafting!

Tuesday, March 7, 2017

Altered: Beautiful Tins

All of us have used lots of moisturizes this winter, and surely there are some empty tins, and bottles lying around waiting to meet the bin. I wanted to use the empty Nivea Creme tins to store some teeny tiny craft elements and so I decided to give them a new look.

I started off by washing the tins thoroughly, leaving them squeaky clean and ready for the makeover. Once dry, I spray painted them Coca Brown and let the paint dry.

TIP: Spray paint the base and lid separately, this will ensure complete coverage. Do not touch the box until it is completely dry; If you do, the paint will just wipe off.

Next I chose some of my favorite stencils, and placed them on the box, in a manner that the design would cover the raised text.
Stampers Anonymous Stencil Floral 2017 release
I am using the Floral stencil from Tim Holtz's layering stencils collection - 2017. Once happy with the position, I stenciled modeling paste onto the box.

Since this is tin, and the base isn't flat, the stencil slips when applying the paste. You can tape it down if you like, but I just held it down with my hand as I wasn't looking for a perfect print.

While the paste was drying, I activated Bashful Blue, Chiffon Pink and Sea Glass Twinkling H2O's for coloring the stenciled design.


Colored parts of the design, and left it to dry.

I altered three tins, using three different designs, and each looks beautiful.


You can layer the inside of the base with felt -- if you like.

Linking it to Altered Eclectics monthly challenge. 

Happy Crafting!
 

Saturday, May 14, 2016

Lets Party!

Hello lovelies, its the second Saturday of the month, and I am delighted to share my projects for Artful Crafting Moodboard Challenge 13.


So I did two projects this time, a card and a 12"x12" layout. I tried, I really tried, to capture the entire process on camera, but my camera wasn't too happy about recording it all. [I am looking into buying another one now, and would love your feedback, recommendations, and suggestions.]


Lets begin with the moodboard and kit:


Our theme is "Layers" and as you can tell by the moodboard, its all happy, colorful, and festive.


I'll start with the card, as that was the first project I worked on. The below video shows you practically everything, except the part where I add UTEE to the frame, and smear it with stickles.


The red dots are liquid pearls, outlined with a gel pen. [All supplies listed in the end.] The inside of the card looks like this:


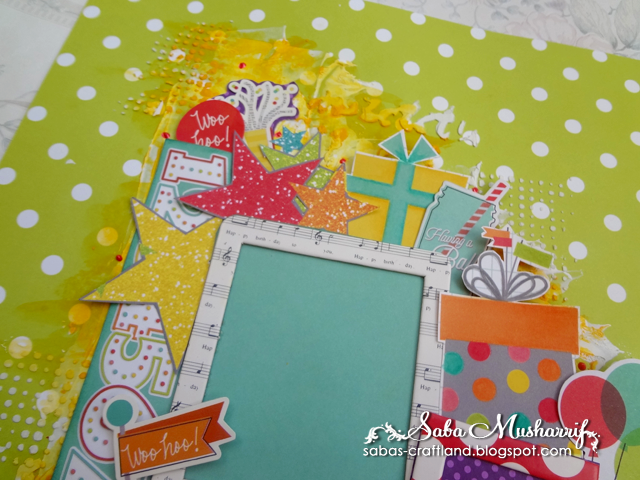
The second project is a 12x12, bright and colorful layout.


In the video below I have managed to capture how the texture was added.


The rest was pretty simple--just adding the layers.


Once the base was dry, I layered the polkadot frame just like I layered the star one, and stuck the round "Hooray" sticker from the sticker sheet, in the center of the frame.


These presents looked so cute! so I decided to stack them next to the frame. I fussy cut the yellow and dotted ones, and then added some highlights to each with color pencils. The below picture shows you the difference that made.


Can you see how it added some dimension, and just made it appear brighter.


Once done, I simply stacked them along the side, with some other elements like stars, flowers, and ribbon.


BTW: The frame has a opening on the top allowing you to slide in a picture.


And last but not the least, I intend to giveaway both the card, and layout. If you are interested please mention so in the comments; if there are more than one people interested, I'll pick randomly. Thanks

Supplies:
Distress crayon: Mustard Seed
Liquid Pearls: Ruby Red
Sticker Sheet: Simple Stories - Let's Party
Cardstock: 12"x12" Simple Stories - Let's Party
Cardstock: 8"x8" Artful Crafting - Dotted Essentials Cup Cake Assortment 
Cardstock: 6"x6" Simple Stories - Let's Party
Cardstock Die Cuts: Simple Stories - Let's Party 
Chipboard Frames: Simple Stories - Let's Party
Mulberry Roses: Artful CraftingTangarine [medium], Burgundy [small]
Glitter Glue: Ranger - Star Dust Stickles
Embossing Enamel: Ranger - UTEE Clear
Brads
Ribbon


Saturday, March 12, 2016

Foil and Flowers

Its spring! Let the flowers blooms <3

The theme for Artful Crafting Challenge 11 is Flowers, and so my project has lots of flowers on it.
I begin with my super fabulous Kit (and speaking of Kit, AC has started its Kit Club and the Spring Kit is up for grabs)


I was so excited to see the Thermoweb Rainbow Deco Foil, and the Thermoweb Deco Foil Adhesive in my Kit! These are so easy to work with and the results are simply amazing.

For the background I stenciled the Thermoweb Deco Foil Adhesive onto an off white base. Now before you start using the adhesive, please unscrew the top and remove the seal.


I layered the Tim Holtz Dot fade stencil onto the cardstock, and applied the adhesive over it with a painters knife.

I spread the adhesive evenly over all the required area. Once done I removed the stencil carefully, and soaked it in water immediately. To ensure that the stencil does not get spoilt, wash it immediately.

Once done, the adhesive needs to dry. As per the instructions, it dries in an hour, but in my case it dried in 10 minutes. I believe the weather, and thickness of the adhesive layer, impacts the drying time.

It is worthy to note here, that unlike other adhesives, the Thermoweb Deco Foil Adhesive stays sticky after it dries, and it is the stickiness that adheres the foil to the design. Each tube of Thermoweb Rainbow Deco Foil contains 5 sheets, and these are pretty thin sheets, so to be safe, when you take one out check ensure its just one and not two.


Next, I covered the adhesive base with foil, as seen above. When adhering the foil, please be sure that the bright shiny side is facing you. Then, gently rub over the foil to ensure it adheres well. I would not advice anyone to use a ruler, or a scoring at this stage, and avoid pressing down too hard on the foil, as it would make the adhesive spread and spoil the design.

Once satisfied, I gently peeled off the foil. Now, if you feel that some areas haven't foiled properly, just rub the foil over it again. As long as the adhesive is sticky, the foil with cover whatever area is left.

I was happy with how it turned out! its so simple and easy.

Now for the Gerbera Daisy, I used the spellbinders die which too was part of my kit.

Using the die, I cut out 16 petals each, 4 large and 2 small petal bases, and 2 centers. These dies make the task of flower making super simple. Just take each petal and push it through each slit, the large and medium petals go in the large base, while the small ones go into the small base. You can add glue to the tab on the bases, and stick the petals down as you push the petals in.

This is what they should look like. By the way, I cut the petals out of MME Look At This, and the petal bases and centers from  American Crafts Banana, textured cardstock.

Next, I shaped the petals lightly, which isn't necessary but I like shaping them. I simply flipped the layer over and shaped the petals with inward strokes. Did the same for the centers to curl them up. Next, I just stacked the layers one on top of the other and glued them down.


Last but not the least, I selected 2 purple Lillies, 1 pink Lilly,  2 pink rosebuds, and 3 leaves from the bunch of amazingly beautiful mulberry flowers, and arranged them over a decorative frame cut out of MME This Moment, which I adhered to the foiled base. Next I added a sentiment to finish it off.

A couple of close ups below:
 

Supplies Used:
Thermoweb Rainbow Deco Foil
Thermoweb Deco Foil Adhesive
Spellbinders Gerbera Daisy
MME Look At This
MME This Moment
American Crafts Banana
Purple Lillies
Pink Lilly
Pink rosebuds

Hope you enjoyed reading this post, looking forward to your entries to Challenge 11

Happy Crafting!
 
Related Posts Plugin for WordPress, Blogger...