
If you have been paper crafting for sometime now, I am sure you have a sizable collection of inks, half of which you've forgotten about, because they aren't 'visible' all the time. Due to limited space, and sheer lack of organization, I had similar issues and so, I decided to make a shelf for these colorful little things.

I started off with this very sturdy gift box, which I had received from Pepsi as part of their Lighting Up Lives Campaign (its a great campaign). I choose to work with this one because the lid and the base have the same depth, making it easier to stack them on their sides.
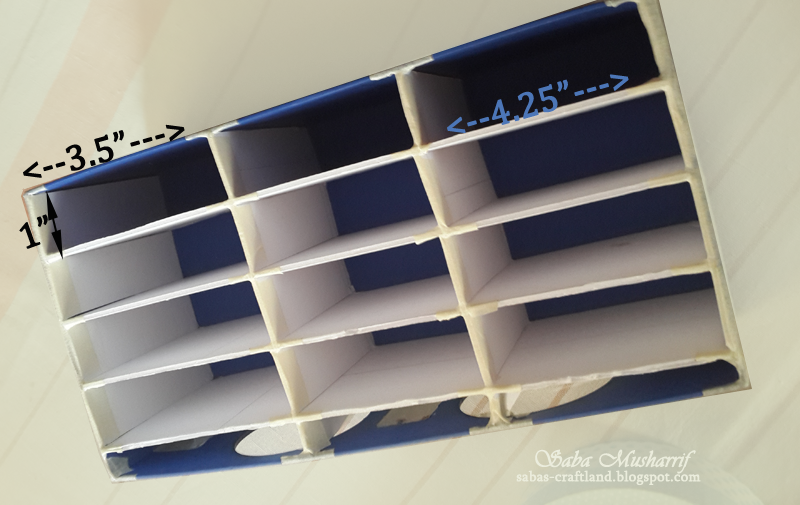
So step one was to basically remove the lid from the base, and add horizontal layers to form the shelves. For the layers I've used light board (left over from a previous project,) which has a thickness of 1/8". Since the Inks pads are not heavy, this board served the purpose well.

Step two was securing the shelves, in place and adding vertical dividers. I cut out comb style dividers, as I felt they would not only be very sturdy but also super easy to adhere. (You will need to add 0.5 inches slits in the shelves too, this will allow the divider and shelf to lock together)

I repeated the same steps for the lid, and then secured it on top of the base. This gave me shelving space to 24 ink pads <3.

Next I simply painted the base, stamped over it, and added chipboard Alphas. Once dry, it was home to some of the ink pads and their accessories!


I am, alhumdolillah, so happy with this. It has made life so much easier. It took me around 5 hours to make it, super easy and so useful. If you don't want to buy one, then try making one for yourself too.
Take care, and happy crafting

Wowwwwwww
ReplyDelete♡♡ thanks Sobia
DeleteWonderful idea! :)
ReplyDelete♡
DeleteThanks for sharing... It was much needed :)
ReplyDeleteGlad to hear that =)
Delete