Saturday, November 14, 2015

Twinkling H2Os

The complete card
This is what I created for Artful Crafting Challenge 8: Water Coloring.

My November kit included Springtime Twinkling H2Os, by Luminarte. I have to confess here, that I had never worked with this product before, and wasn't too sure about what to expect.
Twinkling H2Os - Springtime
The colors were absolutely gorgeous, but when they weren't as vibrant on my water color paper as shown, I knew that I was doing something wrong. In the world of creative arts, there is only one rule -- "Know your tools"; so it was time for some research.

Twinkling H2Os, unlike other water colors are extremely concentrated (75% more than the regular watercolors, as per the company), and therefore, they must be activated with water, atleast 10-15 minutes before you apply them. This is where I was going wrong, I was using them like regular water colors, and that is why the results weren't as expected. Once I misted the pots, and began painting after 10 minutes, I had some beautifully vibrant pearlised colors on the same water color paper. 


Happy with the results, I began working on my DT project. In keeping with all the glimmer, I decided to make a Wedding-ie sort of congratulations card.
Step one: stamp and heat emboss the image
Step two: color it
Step three: stamp the sentiment
Step four: assemble the card.

A close up of all the "Twinkling"

I my opinion, Twinkling H2Os give the project such a grand finish, that the watercolor paper seemed way too dull against it. So, to bring it to life, I coated all the white spaces with Perfect Pearls. This gave it a beautiful off whitish pearlised background.

The angled card
Supplies used:
Twinkling H2Os - Springtime
Altenew - Grapevine Crisp Ink
Altenew - Persian Motifs
Ranger - Gold Embossing Powder
Ranger - Perfect Pearls
Watercolor paper

To see all the inspirational projects put together by the awesome DT, and/or take part in the challenge, hop over to Artful Crafting.

Happy Crafting!


Saturday, October 10, 2015

ACDT Post: Keychains


Hello! hope you all are enjoying the weekend. I have made these keychains for Artful Craftings 7th challenge: Heat Embossing, which is now live.
My task was to create a project using a Melting pot, and so my kit included Gold UTEE and Purple Embossing powder.
Wanting to highlight the many different projects in which UTEE can be used, I decided to move forward with keychains!

The most important tool required for this project is a Melting Pot:
(You need a melting pot because we need to heat the keychain from the bottom -- if we use a heat gun, the powder will fly off)

UTEE Clear, UTEE Gold, Embossing Power: Purple, White, Black and a Keychain
I started by setting the melting pot temperature to UTEE, and placing the keychain in it.
Please note that I've placed the keychain over a piece of paper, and not directly in the pot. There are two reasons for doing this: 1. Once hot, I can lift the keychain off the pot easily by holding on to the paper, and 2. It will keep the back of the keychain clean.
I then sprinkled UTEE, and embossing powders over the keychain and let them melt. Once done, and happy with the results, I removed the keychain from the pot and let if cool off.

IMPORTANT: NEVER touch the hot pan or the heated metal directly, is it extremely hot and can burn your hand!

Using this method, I created 3 keychains, in different designs.
Waves Inspired
Waves Inspired: For this one, I formed lines with purple and white-- once they melted, I took a pin and ran it through horizontally. That created the waves. I then sprinkled some gold UTEE for finishing touches.

Galaxy Inspired
Galaxy Inspired: Started off with Gold UTEE, once it melted, added some purple and pulled it into the gold. Then added some white and set a pearl in it.

Gem Inspired
This was the most complicated. Started with black, then added some purple, once they melted and mixed, added clear UTEE and heated it up again. I then sprayed it with glimmer mist, and heated it up, added more clear UTEE, and some more heat. Then sprinkled gold UTEE and sent a gem in it.

Hope this inspires you to create some fun projects using a Melting Pot.
List of supplies below:
Melting Pot
Embossing Powders: Purple, Sea Foam White, Black
UTEE: Clear, Gold
Glimmer Mist: Thatched Roof Cottage
Key chain
Embellishments

Link to challenge post: Challenge 7: Heat Embossing

Happy Crafting!

Friday, October 9, 2015

Birds On a Swing

Inspired by all the stunning projects appearing on my Instagram timeline, I pulled out my watercolor brushes, dug out some suitable stamps, selected some inks, and got down to some serious coloring!


After some practice, I put together the below card.


I colored the stamped image with distress and memento inks, and stenciled Prima Faded Roses in the background. Stamped the sentiment on the same layer, and added a halo to it, for prominence.


On the inside, I stamped some roses, and painted a trellis.

Whimsy Stamps: Bird Swing, Unity Stamps: Everything Love Kit
Distress inks: Wild Honey, Mustard Seed, Victorian Velvet, Worn Lipstick, Pine Needles, Gathered Twigs, Pumice stone, Broken China, Faded Jeans
Memento: Bamboo Leaves, Rose Bud

Submitting my card to:


Wednesday, September 30, 2015

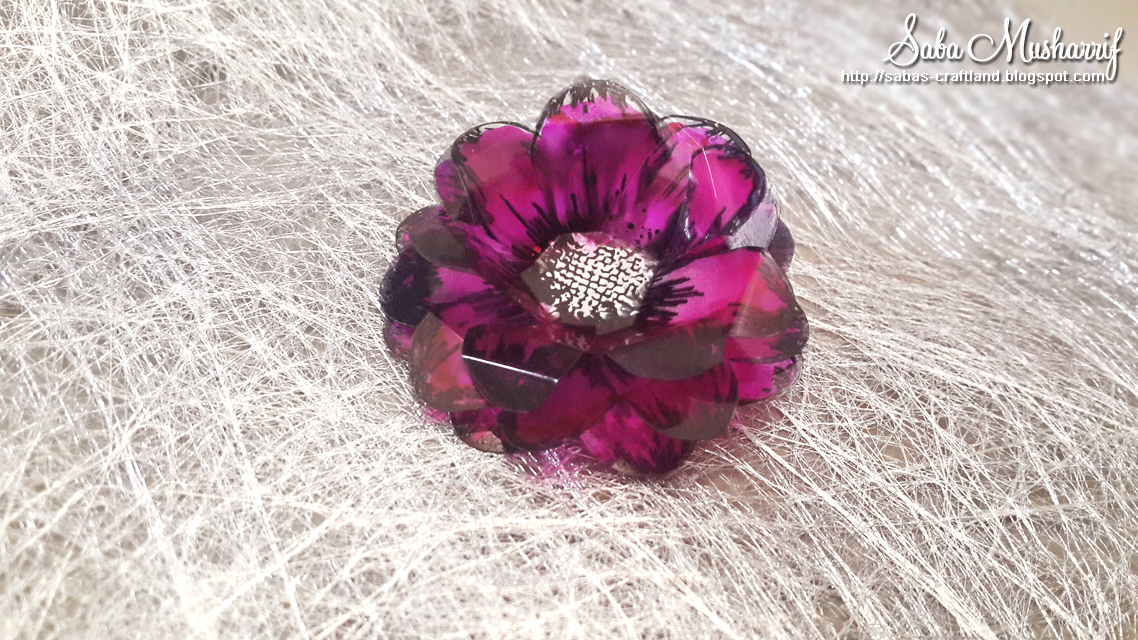
Tutorial: Acetate Flowers

Hello hello! I thought of doing a bonus tutorial this month, and decided on making acetate flowers using alcohol inks. The above picture shows the finished piece. These are super easy to make and take about 10 minutes, max!

Lets get started, supplies required:
Alcohol Ink Blending Solution (optional)
Alcohol Ink: Raspberry (or any other color of your choice)
Alcohol Ink Mixative: Silver (or any other)
StazOn Ink: Black

Stamp: Bo Bunny Floral Stamp
Acetate Sheet
Paint brush
Plastic Palette or something similar


Scissors
Glue

Step 1: Ink up your stamp with StazOn, and carefully stamp out 3 images of the same flower, with the same stamp. (Use StazOn because it works with non-porous surfaces, unlike other inks.)
The stamped acetate

Step 2: Once dry, flip the stamped acetate, and color the reverse image with Raspberry. Be sure to color the petals ONLY. If you want a lighter shade, mix a few droplets of ink with blending solution, and color using a brush, that is what I did. Otherwise, apply the ink directly, and use the brush to control it.

The ink mixed with blending solution
Coloring the petals with a brush

Step 3: When the petals have dried, add a drop of mixative to the center, and spread it, with outward strokes. Remember, that you are coloring the reverse side of the stamped image, so don't panic if the mixative covers the stamped details.
Add a drop of mixative
Spread the mixative

Step 4: Using scissors, cut out the flowers by following the outline. Then, separate each petal by following its outline, without detaching it from the center. The cut out flowers should look something like the the picture below.
Place the flowers, stamped side up, so that all the details of the stamped image are visible. (This is one of the reasons why we color/ink the reverse side)
Cutout flowers with the stamped side up

*From this point forward we work on the flowers with the stamped side up.* 
 
Step 5: Now take one flower, and shape it, by gently bending the entire petal inwards (towards the center). When you bend it in, don't press the crease; you want the petal to stand up when you leave it. Once you've done that with all the petals of this flower, gently turn the tips of the petals outwards, without creasing them.
Bending the petal inwards
Bending the petal tips back

Step 6: Take the second flower, and shape it, by gently bending the tips of the petals outwards, and slightly bending the petal inwards. Unlike the first flower, you will only bend the petals in, half way, so that they aren't flat.
Bending the tips of the petal outwards
Step 7: The shaped layers should look something like this:
L-R: Layer one or top layer, Layer 2 or middle layer, Layer 3 or the base layer.
We will simply stack the layers now by sticking Layer 2 onto layer 3, and layer 1 onto layer 2. The flower has now taken shape.
The assembled flower
I took it a step further and turned it into a brooch, by sticking the gorgeous flower onto a brooch pin.
mounted on a brooch pin
You can now, use this lovely flower however you want.
The gorgeous brooch
Do give it a try, I would love to see your take on it.
Happy Crafting!
 

Thursday, September 24, 2015

Scrapbook (Memory Book): Princess

Fairy tale Princess was one of my recently completed projects; an 8" x 8" scrapbook / memory book made for a baby girl. The requirement was to keep the pages open, as in, not restrict them with specific events, thereby allowing the parents to document moments as they deem fit.

So there are a lot of photomats in there, and lots of room to document.

This a photo wallet, with a cute belly belt.

I love the little details that are part of the Simple Stories: Enchanted collection.

Its not easy being a Princess!

This is such a lovely page, and its a shame that I was unable to capture its beauty, even though I tried several times! The heart is actually silver foil, and the pocket holds a removable tag.

Love the Toad! Micro beads used as centers for the flowers

One of my favorite pages from this book. I love threading the scalloped circles!!


These two pages, were designed with a radio theme -- which was a special request.

Wish, dream and believe!

Shine: Leave a little sparkle where ever you go!

and finally the box:

Since yellow and purple were to be the main colors, I had to use elements and papers from different collections to make this scrapbook / memory book.
The main collections / cardstock used are:
Enchanted - Simple Stories
Dotted Essentials - Artful Crafting

Beauty Seven - Authentique

Happy Crafting!
~Saba


Saturday, September 19, 2015

Tutorial: Playing with Alcohol Inks

Today, I will be sharing a three part video tutorial, showing you how to make the above tag. Ok, so 3 parts does not mean really long videos, these are under 4 minutes each and divided as per the stages;
Background, Elements, and Putting It Together.
(Please note that I wasn't able to do the voice over this time, but I have added captions. I've tried to make these as comprehensive as possible, and tried capturing details like, mounting and inking stamps, mounting the felt pad, and fussy cutting etc)

Here they are:

Part 1: Creating Backgrounds with Alcohol Inks 
(No audio instructions, captions only: To avoid listening to background noise, please mute)


Part 2: Creating Elements with Alcohol Inks
(No audio instructions, captions only: To avoid listening to background noise, please mute)


Part 3: Putting It Together
(No audio instructions, captions only: To avoid listening to background noise, please mute)


List of Supplies used:

Alcohol Inks: Rasberry, Bottle and Cool Peri 
Alcohol Ink Metallic Mixative: Silver
Blending Solution
Felt Pads
Alcohol Ink Cardstock
Tags
Archival Ink- Jet Black
Bo Bunny Floral Stamp
Prima Finnabair Bubbles Stamp
Inkadinkado Thanks stamp set
 
If you have any questions, just post them below and I will respond as soon as possible inshallah!
Happy Crafting!


In response to Jiya's question:
Memento, Archival and StazOn stamped on a glossy surface, inked with Alcohol ink.

Related Posts Plugin for WordPress, Blogger...